How to Create a Remote Github repository
In this article, I will be listing down a few basic instructions to create a remote repository in git. Creating a remote Git repository is a two-step process. First, you need to create a remote repository on your Git hosting system (Github) and then you can push your local changes to it. Let us now take a look at these steps.
Creating a repository on Github
Step 1: Go to Github.com. Sign in/Sign up
Step 2: Click on the “+” sign in the top right and click New Repository:
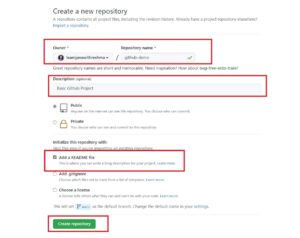
Step 3: In the new repository page, enter the name (github-demo). Click on the checkbox to “Add a Readme” file. Add a description if required. Click on “Create Repository”:
This creates a repository as follows:
Create a Local Repository
The next step is to create a local git repository. For this, you need to follow the steps given below.
Step 4: Open a command prompt/terminal window/git bash prompt
Step 5: Clone the newly created repository by running the following command (Replace <githubusername> with your own username):
git clone https://github.com/<githubusername>/github-demo.git
This command creates the github-demo directory on your local system.
Step 6: Add the necessary files to this directory. For the sake of simplicity, I will be adding just one file called Hello.txt to the github-demo directory. However, you can add all your source code files.
Step 4: Add the newly added files to the local repository. Since I have just the Hello.txt, I will use the following command (after navigating to the github-demo directory):
git add Hello.txt
Step 7: Commit files to your local repository:
git commit -m "Initial commit"
Step 8: Push the changes to the remote repository:
git push origin main
In your browser window, refresh the page and verify that the newly added “Hello.txt” is shown on Github:
You can similarly add your code changes to this repository as required.
Further Learning
Conclusion
So, in this article, we saw how to create a remote Github repository.


Comments
Post a Comment